Are you tired of the same old curtains you see in every store? Do you crave something unique that reflects your personality and style?
Making your own curtains might be the perfect solution for you. It’s a simple yet rewarding project that gives you the power to transform any room in your home. Imagine the satisfaction of looking at your window treatments and knowing they are a product of your creativity.
Not only will you save money, but you’ll also have the chance to choose the exact fabric, color, and design that suits your taste. Ready to unleash your inner designer and learn how to make your own curtains? Keep reading, and discover how easy and fun this DIY project can be!
Choosing Fabric
Choosing the right fabric is crucial when making your own curtains. Consider the room’s purpose and lighting needs. Light fabrics suit airy spaces, while heavier ones offer privacy and insulation.
Choosing the right fabric for your curtains is a crucial step that can transform the ambiance of your space. The fabric you select not only determines how your curtains will hang but also how they will complement your room’s decor. It’s like picking the perfect outfit for your windows—something that reflects your style and meets functional needs.
Types Of Fabric
When selecting curtain fabric, you’ll encounter a variety of options. Cotton is a popular choice due to its versatility and ease of maintenance. It offers a crisp, clean look that suits both modern and traditional interiors. Linen provides a more textured finish, ideal for a casual or rustic vibe. However, it can wrinkle easily, requiring more upkeep. If you’re aiming for a luxurious feel, silk or velvet can add elegance and depth. These fabrics drape beautifully but may require professional cleaning.
Considerations For Color And Pattern
The color and pattern of your curtain fabric can significantly impact your room's mood. Lighter colors can make a room feel more open and airy, while darker hues add coziness and warmth. Patterns can introduce personality and character. Stripes and geometric designs can add a modern touch, while florals might bring a classic or vintage feel. Ask yourself how your choice will interact with existing decor. Do you want your curtains to be a focal point, or should they blend seamlessly with the surroundings?
Measuring Windows
Accurate window measurements ensure curtains fit perfectly. Use a measuring tape to determine width and height. Note the dimensions carefully before purchasing fabric.
Measuring windows is a crucial step in the curtain-making process. Accurate measurements ensure that your curtains fit perfectly, adding the right touch of elegance or coziness to your space. Whether you’re aiming for a floor-grazing look or a window-kissing style, precise measurements are your best friend. Let’s dive into the essentials of measuring windows for your DIY curtain project.
Tools Needed
Before you start measuring, gather all the necessary tools. A reliable tape measure is your most essential tool. Opt for a metal tape measure for accuracy, as fabric ones can stretch. A notebook and pen are also handy to jot down your measurements immediately. If you have a smartphone, consider using a measurement app for additional precision.
Steps For Accurate Measurement
Begin by measuring the width of your window. Measure the width from the outside of the window frame on one side to the outside on the other. This will give you the total width necessary for your curtains. Remember, if you desire a fuller look, you might want to multiply this width by 1.5 or 2. Next, measure the height. Decide where you want your curtains to start and end. For a classic look, measure from the curtain rod to just above the floor. If you’re aiming for drama, let your curtains pool slightly on the floor, adding a few extra inches to your measurement. Consider any additional features like radiators or window sills that might affect the length. These small details can make a significant difference in the final appearance of your curtains. Have you ever found yourself adjusting curtains that just don’t hang right? Accurate measurements can save you from this common frustration. Plus, by measuring twice and cutting once, you ensure that your efforts and materials are not wasted. Happy measuring!
Calculating Fabric Needs
Calculating fabric needs is key to making your own curtains. Measure window width and desired length, then multiply width by two for fullness. Consider fabric pattern repeats and add extra for hems and seams.
Calculating how much fabric you need for your curtains is an essential step in creating a perfect fit for your windows. It’s not just about measuring the window; there’s a bit more math involved. Understanding these calculations will save you time, money, and frustration. Plus, it ensures your curtains hang beautifully.
Formula For Estimating Yardage
To estimate how much fabric you’ll need, start by measuring the width and height of your window. Add extra width to allow for fullness. A good rule of thumb is to multiply the window width by 1.5 or 2, depending on how full you want your curtains to look. For the height, measure from where you want the curtain to start to where you want it to end. Add at least 8-10 inches to this measurement to account for hems and the curtain rod pocket.
Allowances For Seams And Hems
Seams and hems are crucial for a polished look. Add additional fabric for seams on the sides of your curtains. A standard allowance is about 1 inch on each side. This means you’ll need an extra 2 inches in width per panel. For the bottom hem, add about 3-4 inches to the length. This gives a neat, finished edge and ensures the curtain hangs correctly. The top hem will depend on your curtain style. For a rod pocket, add about 3 inches for the pocket and an extra inch for the top hem. By carefully calculating these allowances, you ensure your curtains will not only fit but also look professional. Are you ready to take the plunge and start measuring? It’s easier than you think, and the rewards are well worth the effort.
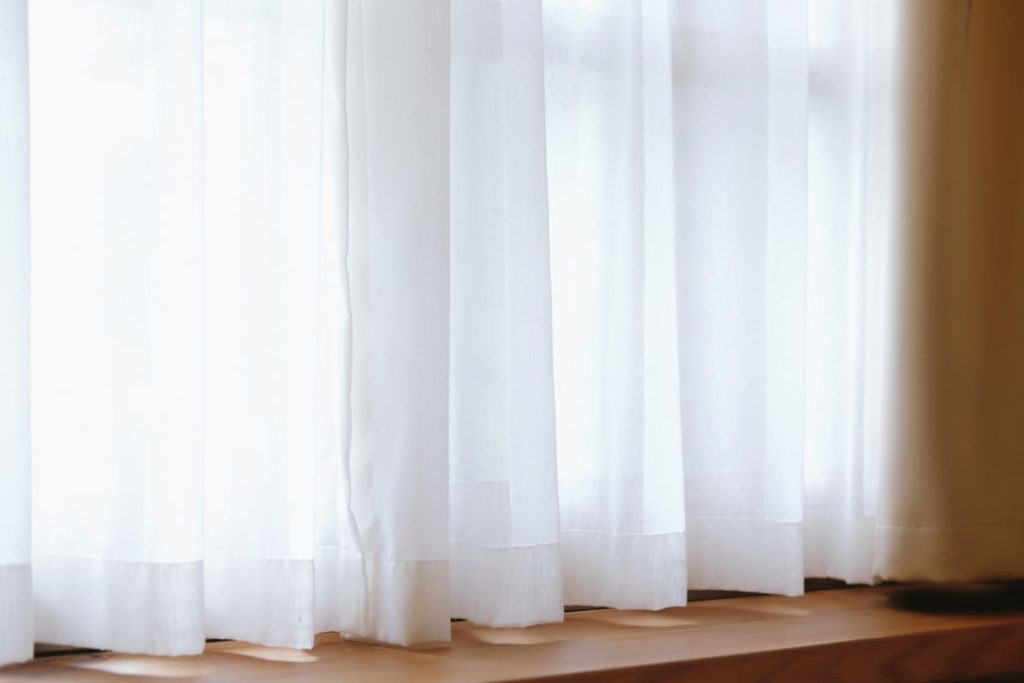
Credit: www.thegritandpolish.com
Cutting Fabric
Measure the fabric, ensuring extra inches for seams and hems. Use sharp scissors for clean edges. Cut carefully, following the measurements precisely to create beautiful curtains.
Cutting fabric is a pivotal step in making your own curtains. It is where your vision starts to take shape. Whether you’re aiming for dramatic drapes or light, airy panels, precise cuts are essential. Let’s dive into preparing and cutting your fabric to ensure your curtains hang beautifully and fit perfectly.
Preparing The Fabric
Start by pre-washing your fabric. This step is crucial as it allows the fabric to shrink before you cut. Imagine spending hours making your curtains, only to have them shrink after the first wash. Iron the fabric to remove any creases. A smooth surface ensures accurate measurements and cuts. Lay your fabric on a large, flat surface, ensuring it’s entirely smooth and free of wrinkles.
Techniques For Straight Cuts
Use a high-quality fabric scissors for clean, straight cuts. Ensure your scissors are sharp to avoid jagged edges. Consider using a rotary cutter and mat for precision. This method is excellent for cutting multiple layers of fabric at once. Place a ruler or a straight edge along the cutting line to guide you. Measure twice, cut once. This old saying holds true, especially when working with expensive fabric. Double-checking your measurements can save you from costly mistakes. Cutting fabric might seem like a simple task, but attention to detail can make all the difference. It’s not just about slicing through fabric; it’s about setting the foundation for beautiful curtains that transform your space.
Sewing Basics
Creating your own curtains involves choosing fabric, measuring dimensions, and sewing straight seams. Use a sewing machine for clean finishes and hems. Add curtain rings or a rod pocket for easy hanging.
Sewing Basics Creating your own curtains can be a rewarding project. Understanding sewing basics is essential. These fundamentals help you craft beautiful and durable curtains. They ensure your curtains hang perfectly and serve their purpose.
Essential Sewing Tools
Having the right tools is crucial. You’ll need a sewing machine. It speeds up the process and ensures neat stitches. Scissors are another must-have. Choose sharp fabric scissors for clean cuts. A measuring tape helps with accurate dimensions. Pins hold fabric in place while sewing. Don’t forget a seam ripper for easy corrections. All these tools make sewing efficient and enjoyable.
Simple Stitch Techniques
Mastering simple stitches is key. Start with the straight stitch. It’s the most common and easy to learn. Use it for hems and seams. The zigzag stitch adds flexibility. It’s perfect for preventing fraying edges. Backstitch strengthens the seams. It’s useful for areas that need extra durability. Practice these stitches on scrap fabric first. This builds confidence and skill.

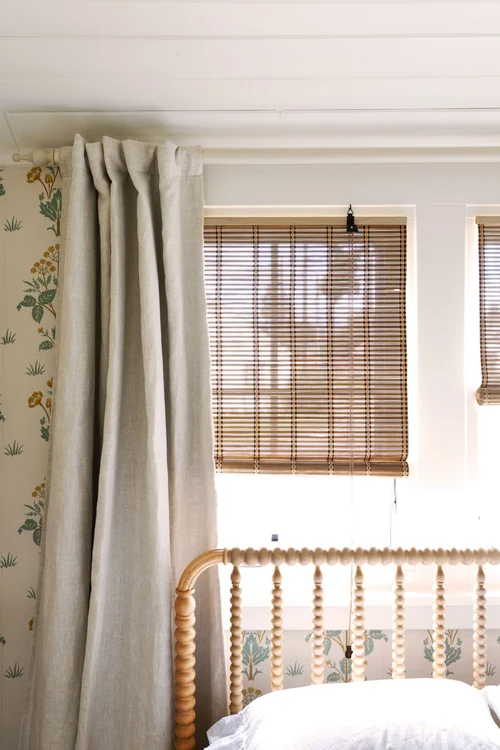
Credit: www.create-enjoy.com
Creating Curtain Rod Pocket
Creating a curtain rod pocket is simple. Fold the fabric edge over the rod and sew straight across. This forms a tunnel for the rod, allowing easy curtain hanging.
Creating a curtain rod pocket is a key step in making your own curtains. It helps the curtain hang properly and move smoothly. This pocket is where the rod slides through, holding the curtain in place. Understanding how to create this pocket is simple with the right guidance.
Width And Placement
Determining the right width for the rod pocket is crucial. Measure the diameter of your curtain rod. Add a few inches to the measurement for ease of movement. This extra space ensures the curtains slide easily. Decide where to place the rod pocket on the fabric. Typically, it’s at the top edge. Leave enough fabric above the pocket for a neat finish. This fabric acts as a ruffle, adding elegance.
Sewing The Pocket
Fold the top edge of the curtain fabric down. Use the measurements decided earlier. Pin the fabric in place to avoid slipping. Sew a straight line across the fold to create the pocket. Make sure the seam is strong. Use a matching thread for a clean look. Backstitch at the start and end to secure the stitching. Check the pocket by sliding the rod through. Ensure it moves freely without resistance. If tight, adjust the seam slightly. Your curtain rod pocket is now ready to hold your curtains beautifully.
Adding Lining
Adding a lining to your curtains can enhance their look and durability. Choose a fabric that complements your curtain material. Measure and cut the lining to fit your curtain dimensions, then sew it to the back for a polished finish.
Adding lining to your curtains can elevate their function and style. Lining offers numerous benefits, from enhancing durability to improving insulation. It can also give your curtains a more luxurious look. Let’s explore the benefits of lining and how to attach it to your curtains effectively.
Benefits Of Lining
Lining extends the life of your curtains by protecting them from sunlight. It keeps the fabric from fading and wearing out quickly. Lined curtains also provide better insulation for your room. They help keep the cold out during winter and maintain coolness during summer. This can contribute to energy savings. Lining can also improve the drape of your curtains. It adds weight, which helps them hang more beautifully. Moreover, lining can block out light, making it perfect for bedrooms and media rooms.
Attaching Lining To Curtains
Begin by measuring your curtain fabric. The lining should match the width and length of your curtains. Cut the lining fabric accordingly. Place the lining fabric behind the curtain fabric. Ensure the sides align perfectly. Pin the fabrics together along the edges. Sew along the top edge to secure the lining. Leave a small allowance for hemming at the bottom. Sew down the sides, keeping the lining flat and smooth. Finally, hem the bottom edge for a neat finish. Your lined curtains are now ready to hang.
Hemming Curtains
Creating your own curtains involves hemming for a polished look. Measure and cut fabric to desired length. Fold, pin, and sew along the edges for a neat hem.
Hemming your own curtains can add a personal touch to your home. It ensures the fabric hangs beautifully and fits your window perfectly. Hemming involves creating a clean, finished edge on your curtains. This process can be simple with the right techniques.
Bottom Hem Techniques
The bottom hem is crucial for a polished look. Start by measuring your desired curtain length. Allow extra fabric for the hem, usually about 4 inches. Fold the fabric up to create a neat edge. Pin it in place to prevent slipping. Sewing the hem can be done with a sewing machine or by hand. Use matching thread for an invisible finish. Sew a straight line across the fold. Remove pins as you sew to avoid needle damage. For a professional finish, press the hem with an iron. This helps the fabric lay flat and look smooth.
Side Hem Tips
Side hems prevent fraying and give curtains a clean edge. Measure and fold the fabric sides inwards, about 1 inch. Pin the folds to hold them steady. Stitch along the fold using a straight stitch. A sewing machine makes this quick and easy. Hand stitching works too, but takes longer. Ensure the thread matches your curtain fabric. This creates a seamless look. Press the side hems with an iron for a crisp appearance. Using these simple techniques, your curtains will look neat and elegant. Hemming may seem tedious, but it enhances your space beautifully.
Hanging Curtains
Creating your own curtains can be a fun DIY project. Measure your windows accurately to determine fabric size. Choose a fabric that suits your decor and sew hems for a polished look.
Hanging curtains can transform the look of any room. They add style, provide privacy, and help control light. But hanging them correctly is crucial for the perfect finish. Let’s explore how to hang your curtains with ease.
Types Of Curtain Rods
Choosing the right curtain rod is essential. There are various types available:
- Cafe Rods:These are lightweight and perfect for sheer curtains.
- Double Rods:Ideal for layering curtains and adding dimension.
- Tension Rods:Easy to install, no drilling needed, great for renters.
- Traverse Rods:Best for heavy curtains, allowing easy opening and closing.
Each type offers unique benefits. Consider your needs before deciding.
Tips For Perfect Placement
Placement affects the overall look of your curtains. Here are some tips:
- Height:Hang rods closer to the ceiling for a taller room effect.
- Width:Extend rods beyond window frames to let in more light.
- Length:Curtains should slightly touch the floor for elegance.
- Balance:Ensure equal space on both sides of the window.
These tips help achieve a professional look with ease.
Decorative Touches
Decorative touches can transform simple curtains into stunning focal points. These small additions offer a personal touch. They reflect your style and creativity.
Adding Trim
Trim can add elegance to your curtains. Choose from lace, pom-poms, or tassels. Attach them to the edges or hem. Use fabric glue for a no-sew option. Sew them on for a more secure finish. Trim creates a frame, enhancing the curtain’s design.
Embellishments And Accessories
Embellishments bring life to plain curtains. Consider using buttons or fabric flowers. They can be sewn or glued on. Use stencils to paint designs. Iron-on patches offer another creative option. Accessories like curtain tiebacks add functionality and flair. Choose beads or metal hooks for a stylish touch.
Care And Maintenance
Creating homemade curtains requires regular care and maintenance. Wash them gently and avoid harsh detergents. Iron on low heat to keep them wrinkle-free and looking fresh.
Making your own curtains is a fulfilling project that adds a personal touch to your home decor. But once they’re hanging beautifully, how do you ensure they stay fresh and vibrant for years to come? Understanding the care and maintenance of your handmade curtains can be the difference between long-lasting elegance and faded fabric. Let’s dive into some practical tips for keeping your curtains in tip-top shape.
Cleaning Tips
Regular cleaning is crucial to maintaining the look and feel of your curtains. Dust and dirt accumulate over time, dulling their appearance. You might be surprised how much brighter your room looks with clean curtains. – Vacuum Regularly: Use a vacuum with a brush attachment to gently remove dust and dirt. This prevents buildup and keeps colors vibrant. – Spot Clean: For minor stains, a mild detergent and a soft cloth can do wonders. Test a small area first to ensure no discoloration. – Hand Wash: If your fabric is delicate, hand washing in cold water is often the safest choice. Avoid wringing to prevent stretching.
Repairing Minor Damage
Even the most careful curtain owners encounter snags or small tears. Repairing these promptly can save your curtains from further damage. – Stitch Small Tears: Use matching thread to sew up minor tears. A simple running stitch can be effective. – Patch Holes: For larger holes, consider using a small piece of matching fabric as a patch. Secure it with fabric glue or sewing. – Replace Hooks and Rings: If curtain hooks or rings break, replace them immediately to prevent sagging or uneven hanging. Maintaining your curtains doesn’t just preserve their beauty—it extends their life. What’s your favorite method for keeping your curtains looking new? Share your tips below!

Credit: www.youtube.com
Frequently Asked Questions
Is It Cheaper To Make Your Own Curtains?
Making your own curtains can be cheaper if you source affordable materials. It often saves on labor costs. Customization allows for personal design preferences. Compare fabric prices and time investment to store-bought options. DIY curtains offer cost flexibility, but evaluate your sewing skills and material expenses for accurate savings.
How Difficult Is It To Make Your Own Curtains?
Making your own curtains can be a manageable DIY project. It requires basic sewing skills, fabric, and tools. Beginners might find it challenging, but with tutorials and practice, it’s achievable. Start with simple designs to build confidence. Custom curtains offer personalization and can be a cost-effective option.
What Are The Easiest Curtains To Make?
Simple rod pocket curtains are the easiest to make. They require minimal sewing skills and materials. Choose lightweight fabrics and straight hems for a beginner-friendly project. You can customize length and width to fit any window. Ideal for DIY enthusiasts seeking a quick and satisfying home decor update.
What Is The Best Material For Homemade Curtains?
Cotton is often the best material for homemade curtains. It’s versatile, easy to work with, and affordable. Linen is another great option for a natural look. Both materials offer good durability and come in various colors and patterns, making them ideal for different decor styles.
Conclusion
Creating your own curtains is a rewarding task. It adds a personal touch to your space. You control the fabric, color, and design. This project lets you learn new skills. Sewing can be a fun and relaxing hobby. Plus, handmade curtains save money.
They’re unique to your style and home. Follow each step carefully for great results. Enjoy the process and the satisfaction of seeing your work hang proudly. With patience and practice, your curtains will look amazing. Start small, and soon you’ll master the art of curtain making.


