
Are you eager to unleash your inner artist and create something beautiful with just a pencil and paper? Imagine impressing your friends and family with your drawing skills by sketching a dining table step by step.
Whether you’re a beginner or someone looking to refine your skills, this guide is designed just for you. You’ll discover simple techniques that transform complex shapes into easy-to-draw forms. By the end, you’ll not only have a completed drawing but also a newfound confidence in your artistic abilities.
Dive in, and let your creativity flow as you learn the secrets to drawing a stunning dining table!
Materials Needed
Gather paper, pencils, and erasers for sketching. Keep a ruler handy for accurate measurements. Use colored pencils to add final touches.
When beginning your journey to draw a dining table, gathering the right materials is essential. Having the correct tools ensures your drawing process is smooth and enjoyable. Let’s explore the basic materials you will need for this creative task.
Pencils And Erasers
Start with a set of pencils, ranging from hard to soft. Hard pencils like 2H are great for initial sketches. Softer pencils like 2B add depth with darker lines. An eraser helps correct mistakes and refine your drawing.
Drawing Paper
Choose a good quality drawing paper. It should be smooth and sturdy. This prevents tearing and allows for easy shading. A4 size is ideal for practice.
Ruler
A ruler is crucial for drawing straight lines. It helps in maintaining proportions. A 12-inch ruler is sufficient for most drawings.
Compass
Use a compass to draw perfect circles. This tool is helpful for creating the round edges of the table.
Sharpener
Keep your pencils sharp with a reliable sharpener. A well-sharpened pencil provides better control and detail.
Colored Pencils Or Markers
Add color with colored pencils or markers. These bring your dining table drawing to life. Choose colors that match your vision.
Reference Image
A reference image guides your drawing. It helps with understanding the table’s structure and details. Pick an image with clear angles and lighting. By gathering these materials, you prepare yourself for a successful drawing experience.
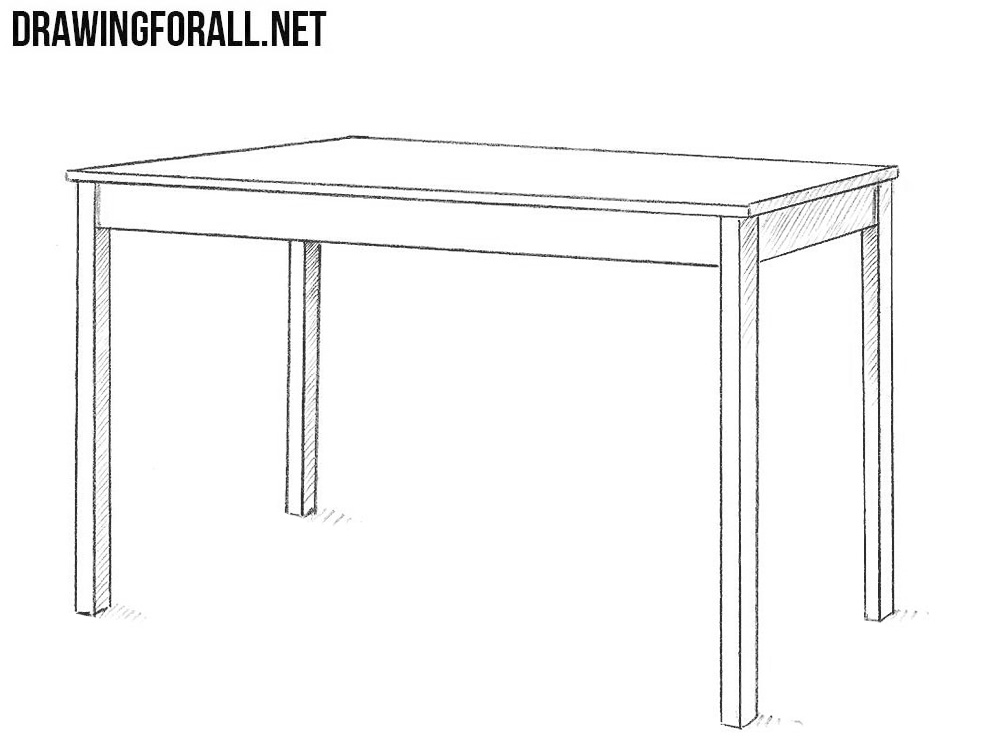
Credit: www.drawingforall.net
Basic Shapes
Begin by sketching a large rectangle for the tabletop. Add four vertical lines underneath for the table legs. Include horizontal lines to connect the legs to the tabletop, ensuring each line is parallel. Refine the edges and add details like shadows or patterns for a realistic touch.
Understanding the basic shapes is key to mastering the art of drawing a dining table. Think of it as assembling a simple puzzle where each piece gradually reveals the bigger picture. By focusing on distinct sections like the tabletop and the legs, you can create a realistic sketch with ease and confidence.
Sketching The Tabletop
Start with a large rectangle for the tabletop. This shape forms the main surface where meals are served and conversations flow. Consider the perspective from which you’re viewing the table. If you’re looking at it from above, the rectangle will appear more like a square. If you’re sketching it at an angle, your rectangle might look more like a trapezoid. By adjusting the shape, you bring depth and dimension to your drawing. Are you seeing the tabletop from a dining room angle, or a bird’s eye view?
Drawing The Legs
The legs of the table are crucial for adding stability and balance to your sketch. Use straight lines to represent each leg, ensuring they are evenly spaced and aligned with the corners of the tabletop. The angle of the legs can vary depending on the style of the table. For a modern look, go for straight, vertical lines. If you’re aiming for a traditional design, slightly angled or curved lines can add elegance. Observe real tables around you for inspiration. Notice how the legs connect with the tabletop and mimic those angles in your drawing. Are your table legs as sturdy as they should be?
Adding Details
Adding details to your drawing gives it life. Focus on textures and shadows to make the dining table realistic. Observe how light interacts with the table’s surface for a more dynamic illustration.
Adding details to your dining table drawing brings it to life. These details create depth and realism, making your sketch more engaging. Focus on textures and edges to enhance the overall look. Use subtle strokes and shading for a realistic appearance. Detailed work requires patience, but it transforms your sketch.
Creating Texture
Textures add depth and dimension to your drawing. Consider the material of your dining table. Is it wood, glass, or metal? For wood, draw small, curved lines to mimic grain. Shade parts of these lines for a realistic effect. For glass, use smooth, light strokes. Highlight reflections to show its surface. Metal requires a different approach. Use long, straight lines for its sheen. Vary your pressure to show light and shadow.
Enhancing Edges
Sharp edges define the structure of your table. Focus on the table’s outline to enhance its shape. Use a darker pencil to emphasize these lines. This contrast separates the table from the background. Refine the legs and top edges for clarity. Pay attention to corners for a natural look. Softening some edges can add a worn feel. It gives the table character and history.

Credit: www.youtube.com
Shading Techniques
Explore shading techniques to bring depth to your dining table drawing. Use light and dark areas for a realistic effect. Experiment with different pencil pressures to create smooth transitions and natural shadows.
Shading techniques are crucial in bringing your dining table drawing to life. They add realism, making your artwork pop with depth and dimension. Mastering shading can seem daunting, but with practice, it becomes second nature. Let’s dive into some essential shading methods that can elevate your dining table sketch from simple outlines to a captivating piece of art.
Light And Shadow
Understanding where the light source is coming from is key to effective shading. Imagine the table under a lamp; the areas closest to the light will appear brighter, while those further away will be darker. To capture this, start by lightly sketching where the light hits the table directly. Use a softer pencil to shade the areas that fall into shadow. This contrast will make your table look three-dimensional. Experiment with different pressures on your pencil to achieve varied shades. You’ll find that gentle strokes can create a subtle gradient that mimics natural light and shadow transitions.
Depth And Dimension
Creating depth requires more than just shading; it’s about understanding the form of the table. Consider how the table legs might cast shadows on the floor or how the top surface might reflect light differently. To create dimension, focus on the edges and corners of the table. These areas often need more defined shading to indicate their shape and position. Practice cross-hatching or stippling techniques to add texture and depth. These methods can provide a richer sense of reality and make your drawing stand out. Remember, every stroke and shade is a step closer to mastering the art of drawing a realistic dining table. As you practice, ask yourself: How does the light transform the space around the table? This question will guide your shading decisions and enhance your artistic skills.
Final Touches
Add final touches to your dining table drawing by refining lines and adding shadows. Enhance details to bring depth and dimension, making your artwork more realistic and visually appealing.
The final touches of your dining table drawing are where the magic happens. These small adjustments and additions can transform your artwork from good to great. You’ll add depth, detail, and a touch of personality that makes your drawing truly unique.
Refining Lines
Refining your lines is crucial to make your drawing crisp and clean. Use a sharp pencil or fine pen to go over the main outlines of the table. This will help define the shape and make it stand out on the page. Consider using varying line weights to add depth. Thicker lines can highlight the edges, while thinner lines can suggest details. Ask yourself: does your table look sturdy and realistic, or does it need more refining?
Adding Accessories
Accessories can add life to your dining table drawing. Think about what usually sits on a dining table in real life. You might add a vase with flowers, a set of plates, or a table runner. Use small details to make these accessories pop. A simple shading technique can give a plate a realistic shine. Remember, these additions should enhance, not overwhelm, your main subject. Consider the setting of your table. Is it set for a casual family dinner or a formal gathering? This can guide your choice of accessories and arrangement. Finally, step back and view your drawing as a whole. Does it tell the story you want? Make any last-minute adjustments to ensure it does.
Tips For Improvement
Begin with sketching the table’s outline using light strokes. Focus on proportion and angles for realistic shapes. Add details like legs and surface texture, refining lines for clarity.
Drawing a dining table can be a rewarding experience. Improving your skills requires patience and practice. Each sketch presents a chance to refine your technique. To guide you, focus on common mistakes and advanced techniques. These tips will enhance your drawing abilities.
Common Mistakes
- Ignoring proportions can distort the table’s appearance.
- Overlooking perspective leads to awkward angles.
- Rushing the outline affects overall symmetry.
- Skipping shading makes the drawing look flat.
Advanced Techniques
- Use light guidelines for accurate proportions.
- Apply perspective rules for realistic depth.
- Add detailed textures for a lifelike effect.
- Experiment with different shading methods.
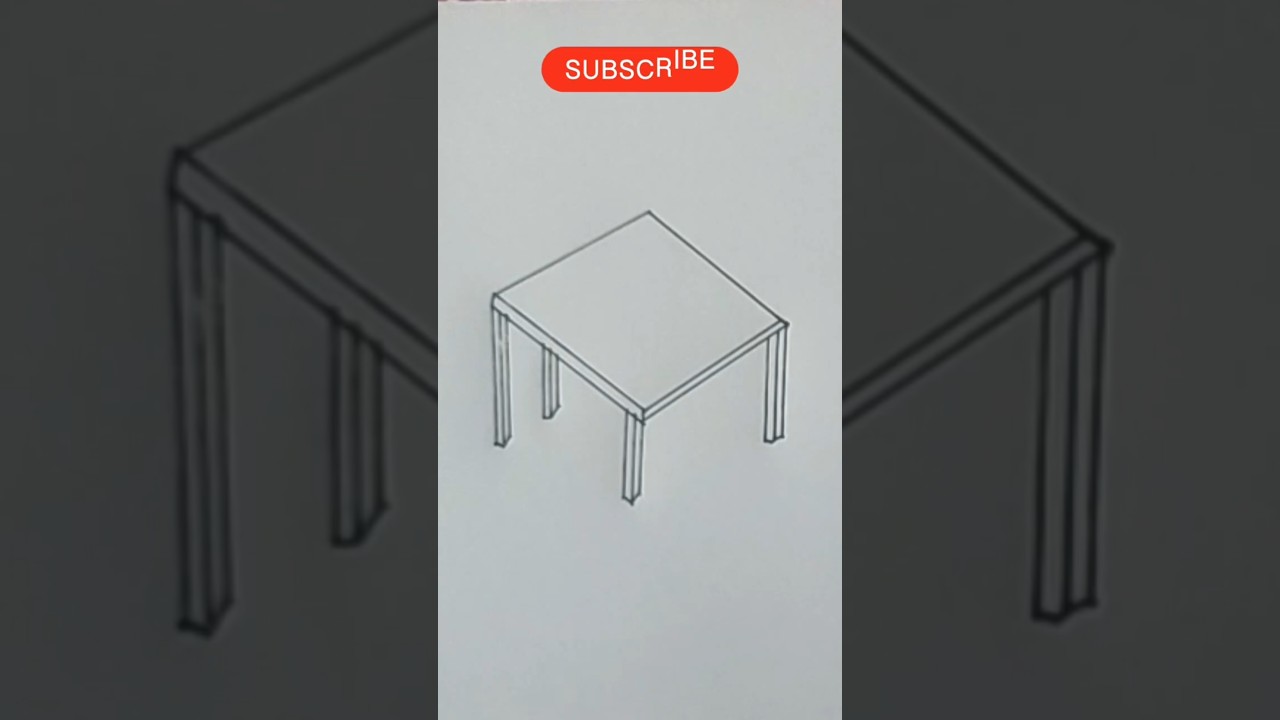
Credit: www.youtube.com
Frequently Asked Questions
How To Draw A Small Dining Table?
Begin by sketching a rectangular or round tabletop. Add four symmetrical legs under the table. Ensure proportions are correct for a small dining table. Include details like wood grain or color for realism. Shade for depth and dimension. Keep lines clean for clarity and simplicity.
How To Draw A Simple Table With A Pencil?
Begin by sketching a large rectangle for the table surface. Draw four straight lines downwards from each corner for legs. Ensure symmetry and proportion for a balanced look. Use gentle shading for depth and dimension. Erase any excess lines for a clean finish.
Practice for perfection.
How To Set Up A Table Step By Step?
Start by placing the tablecloth smoothly on the table. Arrange plates and utensils in proper order. Add glasses and napkins next. Include centerpieces for decoration. Ensure everything is symmetrical and tidy.
How To Make Drawing Easy Step By Step?
Start with simple shapes and lines. Use step-by-step guides or tutorials. Practice regularly to improve skills. Experiment with different techniques and tools. Stay patient and enjoy the process.
Conclusion
Drawing a dining table is easier than you think. Follow these steps carefully. Start with simple shapes. Gradually add details to improve your drawing. Practice regularly to get better. Mistakes are part of learning, so don’t worry. Use different perspectives for a unique look.
Try sketching different table designs. Experiment with colors for a lively touch. Enjoy the process and let creativity flow. Remember, each drawing is unique. Keep refining your skills and have fun. Happy drawing!


