Is your dining room table looking a little tired or outdated? Repainting it can give your space a fresh, new look without breaking the bank.
Imagine transforming your dining area into a stylish haven with just a brush and some paint. You don’t need to be an expert to achieve this; all you need are the right tips and a bit of creativity. This guide will walk you through every step of repainting your dining room table, making it look as good as new.
Ready to unlock the secrets to a chic and personalized dining space? Keep reading to discover how you can breathe new life into your table and impress your guests with your DIY prowess.

Credit: thecrownedgoat.com
Choosing The Right Paint
Choosing the right paint for your dining room table is crucial. It determines the final look and durability. Consider the table’s material and your desired finish. High traffic areas need durable paint. Let’s explore the types of paints and color selection.
Types Of Paints
Different paints suit different needs. Acrylic paint is water-based and dries fast. It’s ideal for a smooth finish. Oil-based paint offers durability and resistance to wear. It takes longer to dry but is strong. Chalk paint gives a matte look with minimal prep. It’s perfect for a rustic feel.
Color Selection
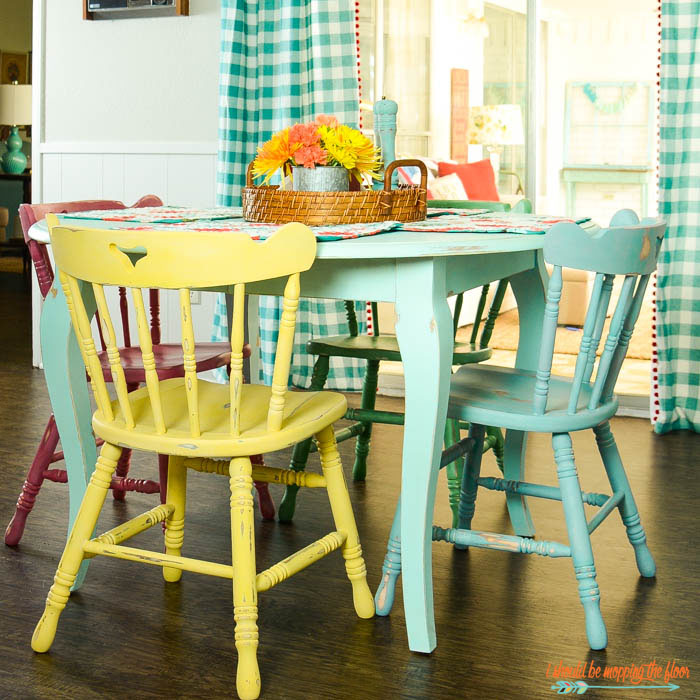
Color affects mood and ambiance. Neutral tones like beige or gray create a calm space. Bold colors, such as red or blue, add vibrancy. Consider your room’s existing decor. Match or contrast colors for a cohesive look. Test paint samples to see how colors look in various lighting.
Preparing The Table Surface
Preparing the table surface requires thorough cleaning and sanding for a smooth base. Remove any dust and old paint to ensure proper adhesion of the new coat.
Preparing the surface of your dining room table is the cornerstone of a successful repainting project. This step sets the stage for a flawless finish and ensures the longevity of the new paint. Whether you’re transforming an antique heirloom or a thrift store find, this process demands attention to detail and a bit of elbow grease. Are you ready to give your table a new lease on life?
Cleaning And Sanding
Start by giving your table a thorough cleaning. Use a mixture of warm water and mild dish soap to remove any grease or dirt. A clean surface allows the paint to adhere better. Once clean, it’s time to sand the surface. Sanding is crucial because it smooths out the wood and helps the paint stick. Use medium-grit sandpaper for initial sanding, then switch to a finer grit for a smooth finish. Don’t forget to sand in the direction of the wood grain. This prevents unsightly scratches and keeps the surface smooth. Sanding might seem tedious, but it’s the secret to a professional-looking paint job.
Repairing Imperfections
Inspect the table for any imperfections such as scratches, dents, or cracks. These can ruin the final look if left unaddressed. Small dings can often be fixed with wood filler or putty. Apply the filler with a putty knife, smoothing it over the imperfections. Once it’s dry, sand the area lightly to ensure it’s level with the rest of the surface. For deeper scratches or cracks, consider using a wood repair kit. These kits are readily available at hardware stores and offer a more durable solution. Remember, a well-prepared surface is key to a stunning repaint. By meticulously cleaning, sanding, and repairing your table, you lay the foundation for a successful transformation. Are there any surface challenges you’ve encountered with your dining table?
Applying Primer
Applying primer ensures a smooth finish on your dining room table. It helps the paint adhere better. Use a brush or roller for even coverage.
Applying primer is a crucial step in repainting your dining room table. It sets the foundation for a smooth and durable finish. With the right primer, your paint will adhere better and last longer. Let’s dive into why priming is essential and how to choose the best primer for your project.
Benefits Of Priming
Primer prepares the surface for painting. It helps to seal the wood and prevents stains from bleeding through. By creating a uniform surface, primer reduces the number of paint coats needed. It enhances the overall appearance, giving your table a professional look. Priming also increases the longevity of the paint, ensuring your table looks great for years.
Choosing The Right Primer
Selecting the right primer is vital. Consider the type of wood and existing finish. Oil-based primers are ideal for surfaces with stains or old finishes. They provide excellent coverage and durability. Water-based primers are easier to clean and dry quickly. They are perfect for new or bare wood. Ensure the primer is compatible with your chosen paint. Check the label for recommendations to ensure a seamless finish.

Credit: www.thesociablehome.com
Painting Techniques
Repainting a dining room table requires simple steps for a fresh look. Start by sanding the surface to remove old paint. Apply a primer to ensure paint sticks well, then paint with your chosen color. Finish with a sealant for protection and shine.
Repainting a dining room table can breathe new life into your dining space. One of the most crucial aspects of this transformation is selecting the right painting techniques. This choice can impact not only the final look but also the durability of the finish. Let’s explore some techniques to help you achieve the best results for your table.
Brushes Vs. Rollers
Choosing between brushes and rollers can be challenging. Brushes offer precision, making them ideal for detailed work and edges. They allow you to get into intricate designs and corners effortlessly. Rollers, on the other hand, cover large areas quickly and provide a smooth, even finish. They’re perfect for the tabletop’s flat surfaces where you want a uniform look. Consider using a combination: brushes for detail work and rollers for broad strokes.
Layering Paint
Layering paint is a technique that can add depth and texture to your table. Start with a primer to ensure the paint adheres well and lasts longer. Once dry, apply your base coat evenly. After the base coat, you can add additional layers for richness. Each layer should be thin and allowed to dry fully. This prevents drips and ensures a smooth finish. Are you looking for a more rustic look? Consider lightly sanding between layers. This gives the table a distressed appearance, perfect for farmhouse or vintage styles. Remember, patience is key; rushing can lead to uneven layers or bubbles. What techniques do you plan to try on your dining room table?
Finishing Touches
Add elegance with the right finishing touches after repainting your dining room table. Consider using a gentle wax or sealant to protect the new paint. Choose subtle decorations like a simple vase or runner to enhance its charm.
Repainting a dining room table can breathe new life into your space, but it’s the finishing touches that truly make it shine. These last steps ensure your hard work lasts, offering durability and aesthetic appeal. Let’s explore how to give your table the perfect finishing touches, transforming it from a simple DIY project to a masterpiece that holds up to daily use.
Sealing The Paint
Sealing your freshly painted table is crucial for long-lasting results. It protects the paint from scratches, spills, and daily wear. Choose a clear, water-based polyurethane sealant for a non-yellowing finish. Apply the sealant with a high-quality brush, ensuring even coverage. For best results, work in a well-ventilated area and allow the sealant to dry completely between coats. You might wonder if one coat is enough, but applying at least two to three coats provides optimal protection.
Adding Protective Coatings
Once the sealant is dry, consider adding an additional protective coating. A wax finish can add a soft sheen and extra layer of defense. It’s perfect for dining tables that see heavy use. To apply, use a clean, soft cloth and work the wax into the surface in circular motions. Let it set for about 15 minutes before buffing with a clean cloth. This step not only enhances the table’s appearance but also makes it easier to clean and maintain. Have you ever thought about how your table stands up to everyday challenges? Adding these protective measures ensures your table remains a beautiful centerpiece, ready for family dinners and gatherings. Embrace these finishing touches, and your dining room table will thank you with years of service and style.
Maintaining Your Painted Table
Revitalize your dining room table by sanding the surface to remove old paint. Choose a suitable paint color and apply evenly with a brush or roller. Let it dry completely before adding a protective sealant for lasting durability. Enjoy a fresh, vibrant look in your dining area.
Maintaining your newly painted dining room table is key to preserving its fresh and vibrant look. With the right care, you can ensure its beauty lasts for years. Whether you’ve gone for a bold color or a subtle shade, understanding how to clean and avoid damage is crucial.
Cleaning Tips
Regular cleaning keeps your table looking its best. Use a soft, damp cloth for routine wiping. This helps remove dust without scratching the surface. Avoid harsh chemicals; they can strip away the paint or cause discoloration. Instead, opt for mild soap or vinegar mixed with water. Think about how often you entertain guests. Regular gatherings might mean more frequent cleaning to maintain that pristine look.
Avoiding Damage
Prevent scratches by using placemats and coasters. These simple items can save your table from unsightly marks. Consider the temperature of items you place on the table. Hot dishes can cause the paint to bubble or peel. Use trivets to protect the surface. Ask yourself: is your table a centerpiece or a functional piece? Its role could determine how you treat it daily. Regularly inspect the table for chips or cracks. Early detection can prevent further damage and help maintain its appearance. Keep your table out of direct sunlight. UV rays can fade the paint over time, dulling its vibrant color. Following these tips can help you enjoy your beautifully painted dining room table for many years, making every meal a delightful experience.
Credit: www.lemon8-app.com
Frequently Asked Questions
What Kind Of Paint Do You Use On A Dining Table?
Use durable, non-toxic acrylic or chalk paint for dining tables. These paints resist spills and scratches effectively. Ensure proper sanding and priming before application. Choose a finish like satin or semi-gloss for easy cleaning and a polished look. Always allow adequate drying time between coats for best results.
How To Paint A Table That Is Already Painted?
To paint a table already painted, first sand the surface. Clean thoroughly to remove dust. Apply primer for better adhesion. Choose quality paint and apply evenly. Let dry completely.
Can You Paint A Dining Room Table Without Sanding?
Yes, painting a dining room table without sanding is possible. Use a high-quality primer designed for glossy surfaces. Clean the table thoroughly before applying the primer. Ensure the primer adheres well to the surface for a smooth finish. Follow up with your chosen paint for best results.
Can You Just Paint Over A Table?
Yes, you can paint over a table with proper preparation. Clean, sand, and prime the surface first. Choose suitable paint for the material. Apply thin, even coats for best results. Ensure the table is dry before using it. This process helps achieve a smooth, durable finish.
Conclusion
Repainting your dining room table transforms your space effortlessly. With patience and the right tools, achieve a fresh, inviting look. Clean the surface thoroughly before starting. Sanding ensures paint sticks properly. Choose a color that matches your decor. Apply primer first for a smooth finish.
Multiple thin coats work best. Let each layer dry completely. Protect your work with a clear sealant. This step adds durability. Enjoy your updated table, perfect for gatherings or daily meals. You’ve learned a skill that enhances home value and beauty.
Happy painting!


